If you’ve ever watched a car body panel snap into place like it was made for it (spoiler: it is), you might’ve wondered how those little metal or plastic fasteners hold everything together so tight—and so consistently. As an automotive fasteners supplier, I’ve seen way too many shop floor mistakes turn a simple panel install into a headache: stripped threads, cross-threaded bolts, even fasteners falling off because someone skipped a step. Today, I’m breaking down the actual, go-to installation steps we share with every customer, no fancy jargon, just real talk that works for both DIYers and pro techs. Automotive Fasteners

First, let’s get one thing straight: automotive fasteners aren’t one-size-fits-all. That tiny plastic clip holding your inner fender on is nothing like the bolt securing your door panel’s metal reinforcement. But regardless of type, skipping prep work is the #1 mistake I see. Let’s start there.
Step 1: Prep the Panel & Fastener Interfaces (Don’t Skip This, I Beg You)
I know, prepping sounds like busywork, but it’s what separates a fastener that lasts 10k miles from one that fails in 10 months. First, pull back or clean the mounting holes. Over time, those holes get caked with old rust, dirt, leftover paint, or even old adhesive residue from the previous panel—this stuff creates gaps, so the fastener won’t seat right, and you’ll end up with a wobbly panel or stripped threads. For metal panels, I grab a wire wheel (small ones for tight spaces) or a nylon brush to scrub the hole clean, then wipe it down with isopropyl alcohol to get rid of any grease or dust. For plastic body panels (think bumper covers or hatch doors), I skip the wire wheel—too easy to scratch the plastic and weaken it—so I just use a shop towel and alcohol, plus a plastic pick to dig out any crusted dirt that’s stuck in the hole’s threads.
Then, check the fastener itself. It sounds dumb, but I’ve had customers call me panicking because their new bolt was scratched or had a burr on the shaft. A burr will catch on the hole as you screw it in, cross-thread the whole thing before you even get it tight. Lay all your fasteners out on a clean rag before you start—no grabbing a random one from a bin—and give each a quick once-over for defects. If it’s got a scratch or a burr, toss it. We replace fasteners all the time, and it’s way better than having to pull a whole panel to fix a botched install later.
Step 2: Align the Panel Properly (No Forcing It!)
This is where a lot of people rush. You’ve got the panel in your hand, you’re ready to throw the fasteners in—but if it’s not aligned right, forcing the fastener will strip threads, crack plastic, or bend the panel. Here’s my go-to trick: hand-place the panel in the mounting points first, and wiggle it gently until it sits flush with the surrounding bodywork. No lopsided gaps, no misaligned edges. If there are locating pins (those little plastic or metal nubs sticking out of the frame), make sure the panel’s holes slide over them easily. If they don’t? Don’t push harder. Loosen the panel a little, adjust your grip, and try again. I once watched a tech force a bumper onto a truck and snap three locating pins—cost him an extra hour of work and $20 in parts, all because he wanted to save 30 seconds. Not worth it.
Once the panel is roughly aligned, I like to hand-tighten the first fastener halfway. This acts like an anchor so the panel doesn’t shift while you’re installing the rest. For example, when installing a rear quarter panel, I’ll hand-screw the top bolt first, make sure the gap is even, then work my way down the side. Pro tip: if there are multiple fasteners, don’t tighten any of them all the way yet until every single one is in and snug. More on that in a sec.
Step 3: Choose the Right Tool & Set Torque (Yes, Torque Matters)
Okay, tools. I see people use whatever’s lying around—screwdrivers, regular wrenches, even their fingers—but automotive fasteners need specific tools to avoid damage. For plastic fasteners (like push clips or nylon bolts), use a Phillips screwdriver that fits perfectly in the head. A loose screwdriver will slip, strip the screw head, and turn a 2-minute job into a 20-minute nightmare. For metal bolts and nuts, use a socket set that matches the fastener’s size (no “close enough” 10mm socket for a 9.8mm bolt—you’ll round the head).
Now, torque. This is non-negotiable, especially for newer cars. Torque is how tight you turn the fastener, and it’s not a “screw it as hard as you can” thing. Too loose, and the fastener will vibrate loose while you’re driving. Too tight, and you’ll strip threads, crack the panel, or break the fastener entirely. As a supplier, we print torque specs on every fastener package we send out, because guess what? A fastener that works on a Honda Civic isn’t the same as one for a heavy-duty pickup truck. For example, a common door panel bolt might need 8-10 lb-ft of torque, while a bumper reinforcement bolt might need 15-20 lb-ft. If you don’t have a torque wrench (the affordable $20 ones work great for hobbyists), err on the side of less tight, not more. You can always go back and tighten a little, but you can’t un-break a snapped bolt.
Quick note: for push clips or snap-in fasteners (common for interior panels like door cards), torque doesn’t apply here. The rule is, push it until you hear a solid click, then give it a gentle tug to make sure it’s seated. If it wiggles, pop it out and re-seat it—don’t push it harder, you’ll crack the clip or the panel.
Step 4: Tighten Fasteners in a Crisscross (Not Clockwise!)
Here’s the step most DIYers and even some techs get wrong. When you’re final tightening, don’t just tighten all fasteners in a straight line from top to bottom, left to right. That causes uneven pressure, which warps the panel, creates lopsided gaps, and puts stress on individual fasteners that can lead to failure later. The correct method is crisscross tightening, or what we call “star tightening” in the biz. Let’s say you have four bolts securing a trunk lid: tighten the top left bolt halfway, then the bottom right, then top right, then bottom left, then go back and do each one again in the same order until you hit the torque spec. This spreads the pressure evenly across the entire panel, so it sits flat and doesn’t warp. I’ve seen this fix a lopsided hood on a customer’s car in 5 minutes, all from just changing the order of tightening.
Step 5: Double-Check Every Fastener (No Shortcuts)
Once you’re done tightening, walk around the panel and give every fastener a gentle tug or tap. For metal bolts, make sure they don’t spin or wiggle. For push clips, pull on the panel a little (not hard) to make sure it’s not loose. If something feels off, don’t ignore it—pop the fastener out, check the threads again, and re-install it. I once had a customer call me a week after installing a fender saying it fell off on the highway. Turns out he skipped the double-check, and one bolt wasn’t tightened at all. He had to replace the fender, the bolt, and get his car towed—all because he didn’t take 2 minutes to double-check.
Wait, hold on—what about corrosion? If you’re installing fasteners on a metal body panel that’s older, there’s a good chance the holes have a little rust. I always recommend a tiny dab of anti-seize lubricant on the bolt’s shaft before installation, but only on metal fasteners that go into metal holes. Anti-seize prevents the bolt from seizing to the panel over time, so you don’t have to drill it out later when you need to remove the panel for a repair. Don’t use too much, though—you don’t want it oozing out and getting on paint or trim. For plastic fasteners, skip the anti-seize, it can weaken the plastic.
Another thing: when we ship fasteners, they come in specific quantities for a reason. If you find yourself with extra fasteners when you’re done, that means you either left one out, or you used the wrong ones. That’s a red flag—go back and count, because a missing fastener is a safety hazard, even if it’s just an interior panel.
Now, let’s talk about common mistakes I see that people don’t realize are a big deal. First, reusing old fasteners. I know, it’s tempting—you’ve got a push clip that looks fine, so you don’t want to buy new ones. But fasteners are designed to be a single-use part. Push clips get brittle over time, plastic bolts crack when you remove them, even metal bolts can get stretched or have damaged threads after being taken out. Reusing them leads to 30% more fastener failure rates, according to the automotive industry data we rely on. So yeah, spend the extra $5 on a pack of new clips—it’s worth it.
Second, mixing fastener types. Don’t use a bolt meant for a door panel on a bumper, or a plastic clip meant for an interior on an exterior panel. Different fasteners are made for different load demands. Exterior fasteners have to hold up to rain, road grime, and vibration, while interior ones just need to hold a trim piece in place. Using the wrong one is a quick way to a broken panel.
If you’re a pro tech or a shop owner reading this, fastener installation isn’t just a box to check—it’s part of the quality of the repair. Bad installs lead to bad reviews, comebacks, and lost work. If you need high-quality, consistent fasteners for any panel job, our team can help you pick the right type, size, and torque specs for every make and model, no hassle. Whether you’re fixing a personal car or running a shop, we’ve got you covered.
If you’re tackling this as a DIYer, take your time. Rushing leads to mistakes, and these steps don’t take that long if you follow them. At the end of the day, a properly installed panel isn’t just about looking good—it’s about safety, too. A loose fender can come off on the road, blocking other cars or causing an accident. That’s why getting the fastener install right matters way more than just getting the panel on.
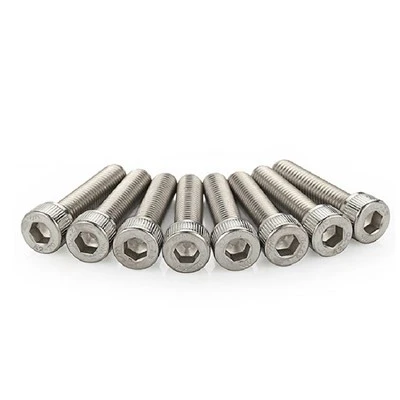
Before I wrap this up, I want to shout out that we test every fastener we sell for shear strength, corrosion resistance, and torque retention, so you know you’re getting parts that work. No cheap knockoffs, no inconsistent quality—just reliable automotive fasteners for every job. If you’re looking to stock up for upcoming projects, or you need help figuring out exactly what you need for a specific panel, hit us up to connect on procurement. We’re here to make your install go smooth, no headaches.
Screw References:
Automotive Industry Fastener Performance Standards, SAE International
Body Panel Installation Best Practices, Automotive Service Association (ASA)
Fastener Reusability Study, National Institute for Automotive Service Excellence (ASE)
Wuyuan Jieyi Automotive Electrical Appliance Co., Ltd.
As one of the most professional automotive fasteners manufacturers and suppliers in China, we’re featured by quality products and good service. Please rest assured to wholesale bulk durable automotive fasteners in stock here from our factory. We also accept customized orders.
Address: No. 7 Likeng Road, Industrial Park Wuyuan County, Shangrao City, Jiangxi Province
E-mail: wyjydqz@163.com
WebSite: https://www.wyjydq.com/
